さて、今回はThree.jsを使って動くページを作成してみたいと思います。
基本的なテンプレートを設定 // HTML-Three.js ライブラリの読み込み
src="https://cdnjs.cloudflare.com/ajax/libs/three.js/r128/three.min.js"
// CSS-画面全体のレイアウト設定
body {
margin: 0; overflow: hidden;
}
canvas {
display: block;
}
#text-overlay {
position: absolute;
top: 50%;
left: 20%;
transform: translateY(-50%);
color: white;
font-weight: bold;
font-family: Arial, sans-serif;
font-size: 36px;
text-shadow: 2px 2px 4px rgba(0,0,0,0.5);
}
const scene = new THREE. Scene ( ) ;
const camera = new THREE. PerspectiveCamera ( 45 , window. innerWidth / window. innerHeight, 0.1 , 1000 ) ;
const renderer = new THREE. WebGLRenderer ( { antialias : true } ) ;
renderer. setSize ( window. innerWidth, window. innerHeight) ;
renderer. setPixelRatio ( window. devicePixelRatio) ;
document. body. appendChild ( renderer. domElement) ;
window. addEventListener ( 'resize' , onWindowResize, false ) ;
function onWindowResize ( ) {
camera. aspect = window. innerWidth / window. innerHeight;
camera. updateProjectionMatrix ( ) ;
renderer. setSize ( window. innerWidth, window. innerHeight) ;
} 地球のメッシュを作成 SphereGeometryを作成し、カメラの位置とレンダリングを設定
const earthGeometry = new THREE. SphereGeometry ( 1 , 64 , 64 ) ;
const earth = new THREE. Mesh ( earthGeometry) ;
scene. add ( earth) ;
camera. position. set ( 1 , 0 , 4 ) ;
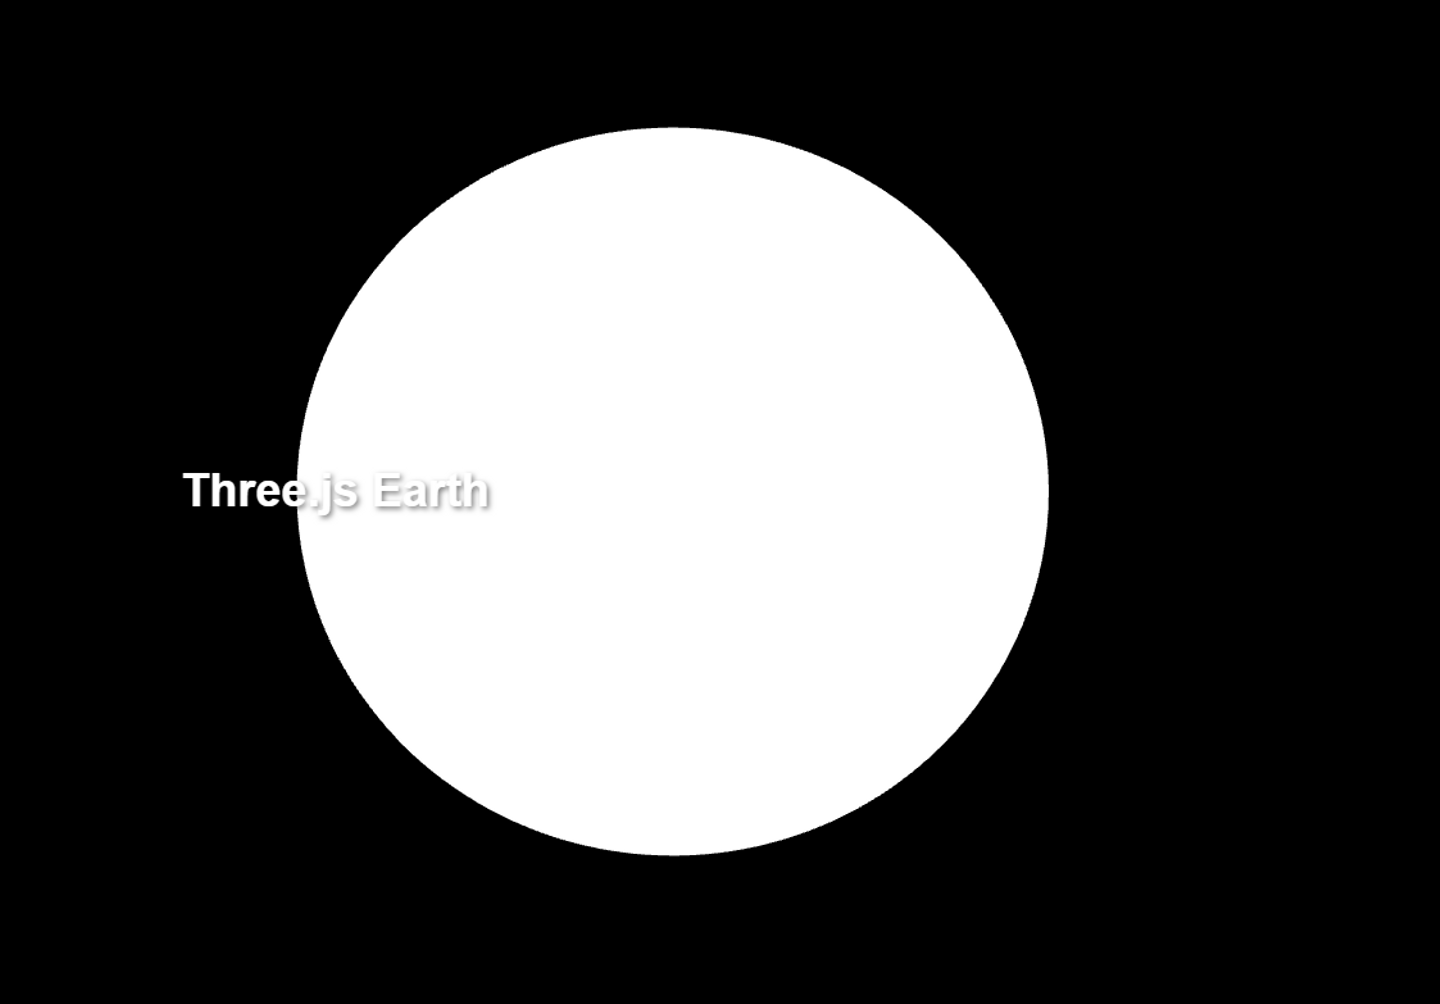
renderer. render ( scene, camera) ; 地球のマテリアルを作成
const earthGeometry = new THREE. SphereGeometry ( 1 , 64 , 64 ) ;
const earthMaterial = new THREE. MeshPhongMaterial ( {
specular : new THREE. Color ( 'grey' ) ,
} ) ;
const earth = new THREE. Mesh ( earthGeometry, earthMaterial) ;
scene. add ( earth) ; 画面が見えるように光も追加
const ambientLight = new THREE. AmbientLight ( 0xffffff , 0.2 ) ;
scene. add ( ambientLight) ;
const sunLight = new THREE. DirectionalLight ( 0xffffff , 1 ) ;
sunLight. position. set ( 5 , 3 , 5 ) ;
scene. add ( sunLight) ;
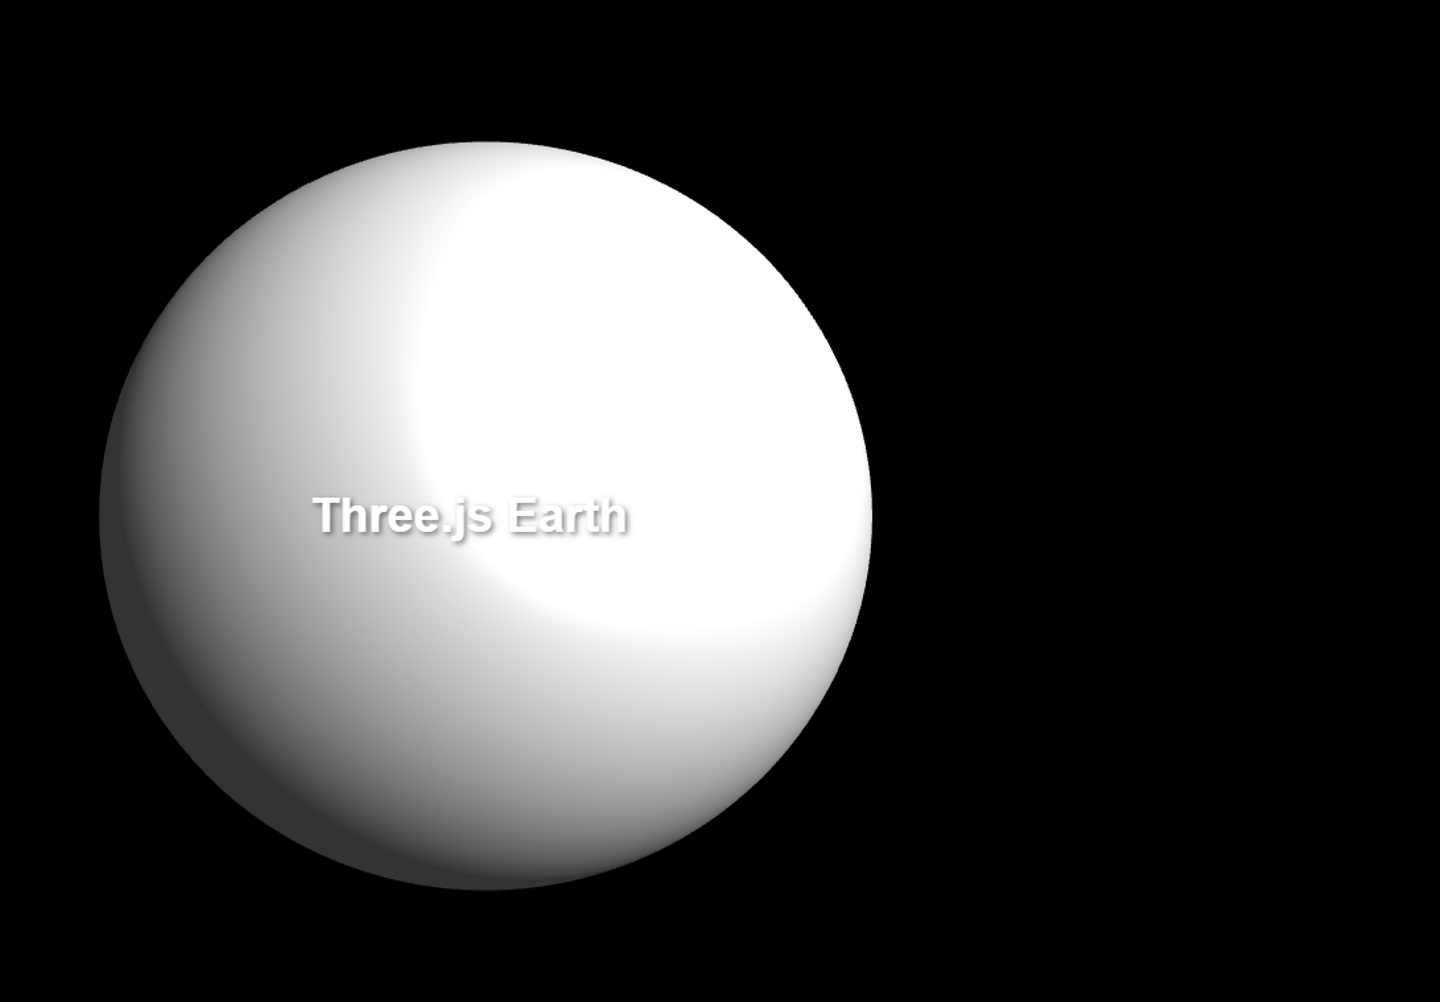
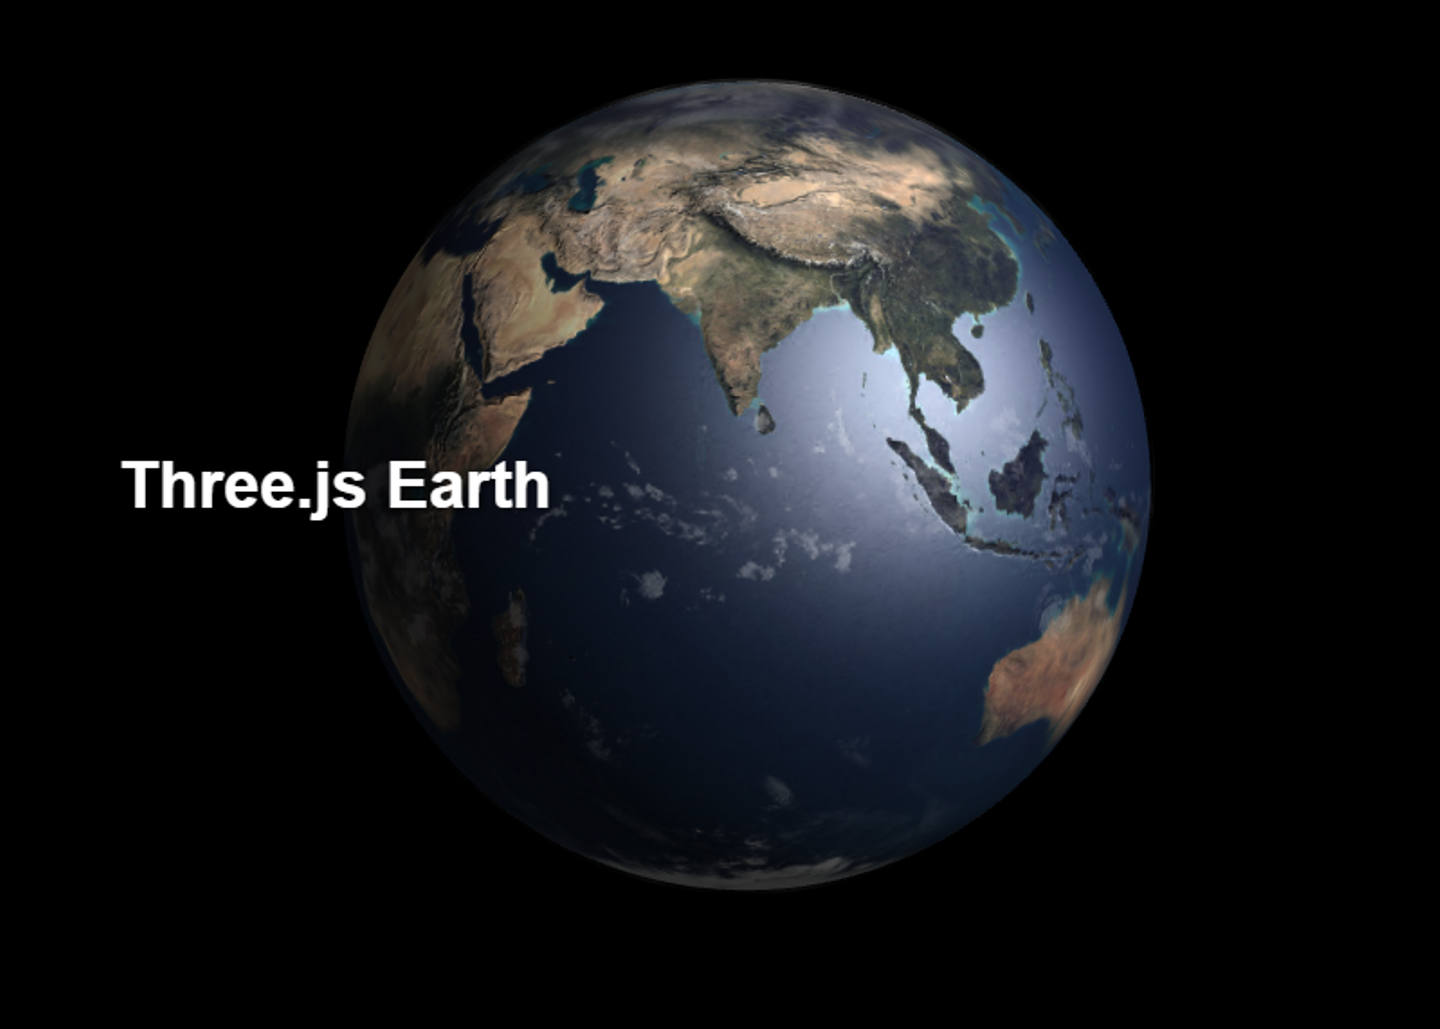
地球のテクスチャを作成
const earthGeometry = new THREE. SphereGeometry ( 1 , 64 , 64 ) ;
const textureLoader = new THREE. TextureLoader ( ) ;
const earthTexture = textureLoader. load ( 'https://threejs.org/examples/textures/planets/earth_atmos_2048.jpg' ) ;
const earthNormalMap = textureLoader. load ( 'https://threejs.org/examples/textures/planets/earth_normal_2048.jpg' ) ;
const earthSpecularMap = textureLoader. load ( 'https://threejs.org/examples/textures/planets/earth_specular_2048.jpg' ) ;
const earthMaterial = new THREE. MeshPhongMaterial ( {
map : earthTexture,
normalMap : earthNormalMap,
specularMap : earthSpecularMap,
specular : new THREE. Color ( 'grey' ) ,
shininess : 10
} ) ;
function animate ( ) {
requestAnimationFrame ( animate) ;
earth. rotation. y += 0.002 ;
renderer. render ( scene, camera) ;
}
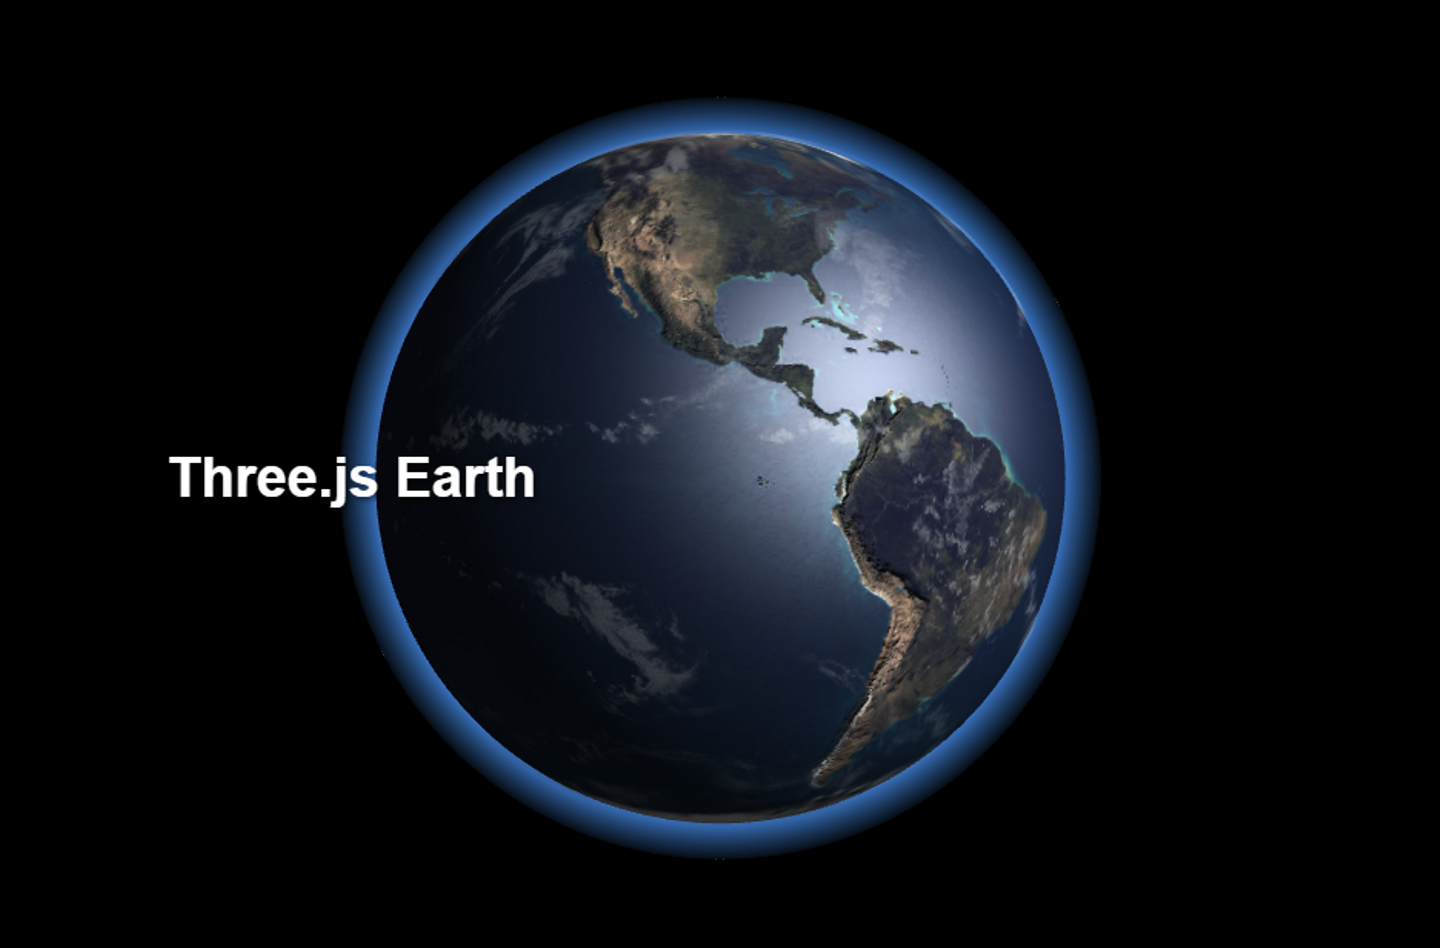
animate ( ) ; これでもう完成ですが、見た目をさらによくするために、雲層と大気圏も作りましょう。
雲層を追加
const cloudsGeometry = new THREE. SphereGeometry ( 1.01 , 64 , 64 ) ;
const cloudsTexture = textureLoader. load ( 'https://threejs.org/examples/textures/planets/earth_clouds_1024.png' ) ;
const cloudsMaterial = new THREE. MeshPhongMaterial ( {
map : cloudsTexture,
transparent : true ,
opacity : 0.4
} ) ;
const clouds = new THREE. Mesh ( cloudsGeometry, cloudsMaterial) ;
earth. add ( clouds) ;
camera. position. set ( 0 , 0 , 5 ) ;
function animate ( ) {
requestAnimationFrame ( animate) ;
earth. rotation. y += 0.002 ;
clouds. rotation. y += 0.0023 ;
renderer. render ( scene, camera) ;
} 大気圏を追加
const atmosphereGeometry = new THREE. SphereGeometry ( 1.1 , 64 , 64 ) ;
const atmosphereMaterial = new THREE. ShaderMaterial ( {
vertexShader : `
varying vec3 vNormal;
void main() {
vNormal = normalize(normalMatrix * normal);
gl_Position = projectionMatrix * modelViewMatrix * vec4(position, 1.0);
}
` ,
fragmentShader : `
varying vec3 vNormal;
void main() {
float intensity = pow(0.7 - dot(vNormal, vec3(0.0, 0.0, 1.0)), 2.0);
gl_FragColor = vec4(0.3, 0.6, 1.0, 1.0) * intensity;
}
` ,
blending : THREE . AdditiveBlending,
side : THREE . BackSide
} ) ;
const atmosphere = new THREE. Mesh ( atmosphereGeometry, atmosphereMaterial) ;
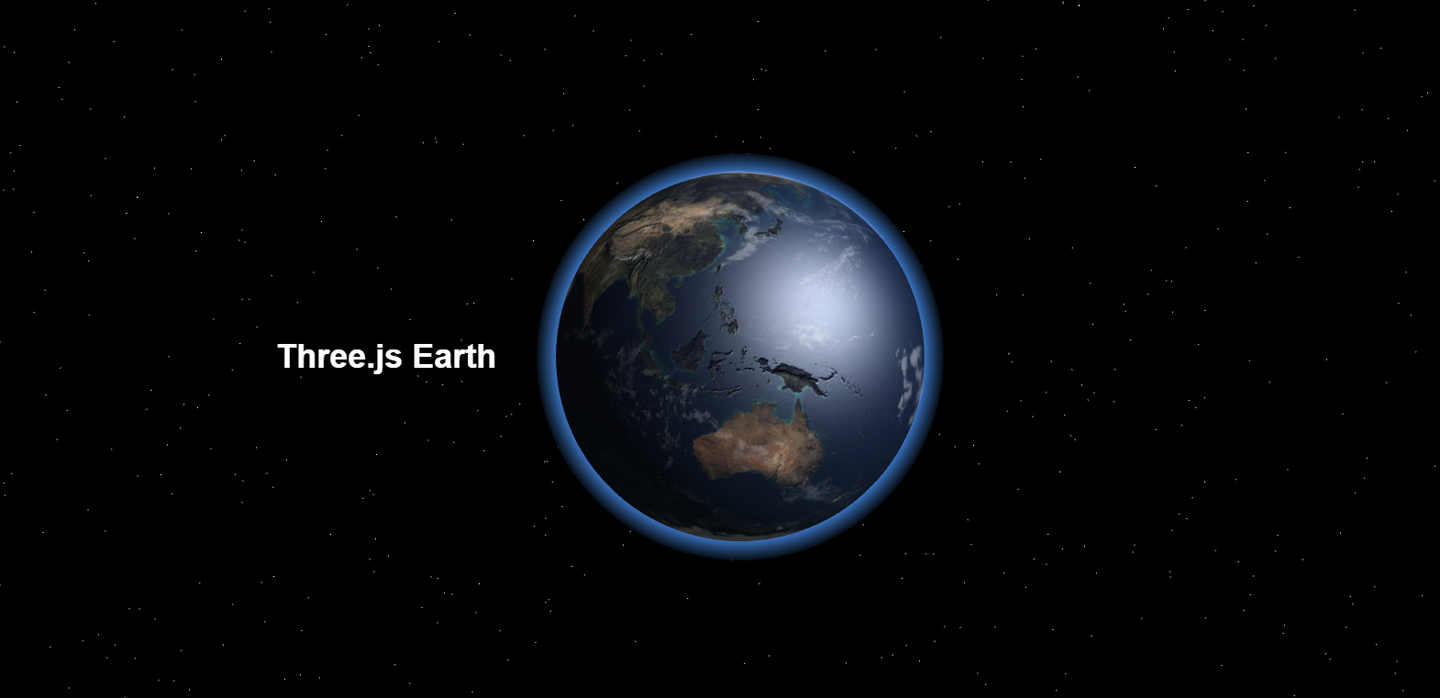
scene. add ( atmosphere) ; 最後に背景を追加したら完成です!
星空の背景を追加
const starsGeometry = new THREE. BufferGeometry ( ) ;
const starsMaterial = new THREE. PointsMaterial ( { color : 0xffffff , size : 0.02 } ) ;
const starsVertices = [ ] ;
for ( let i = 0 ; i < 10000 ; i++ ) {
const x = THREE . MathUtils. randFloatSpread ( 2000 ) ;
const y = THREE . MathUtils. randFloatSpread ( 2000 ) ;
const z = THREE . MathUtils. randFloatSpread ( 2000 ) ;
starsVertices. push ( x, y, z) ;
}
starsGeometry. setAttribute ( 'position' , new THREE. Float32BufferAttribute ( starsVertices, 3 ) ) ;
const starField = new THREE. Points ( starsGeometry, starsMaterial) ;
scene. add ( starField) ;
おわりに いかがでしょうか?基本的な考え方は、まずシーン、カメラ、レンダラーを設定し、カメラの位置を調整します。そのあとでSphereGeometryを三つ作成し、それぞれに異なるマテリアルを与えて、同じ場所に配置します。
最後まで読んでいただき、ありがとうございます。これからも頑張ります!
記事を読んで興味を持った方はぜひコチラから↓
/assets/images/2125371/original/ddd7dc60-0d09-4013-af2f-6cbe9f986e0f?1640614821)
/assets/images/2125371/original/ddd7dc60-0d09-4013-af2f-6cbe9f986e0f?1640614821)